Little Collections

I am making  little collections of limited edition prints from paintings and sketchbooks. 
Over the holidays I shall put together some others.  Each print is small, about 7cm x 10 cm or 2.5 inches x 4 inches. The size of a playing card.   They look wonderful framed in little frames and displayed together.  Printed on beautiful archival watercolour paper they are wrapped in a little folio made from watercolour paper.  Each collection will hold 12 little prints. 
This first one is from a trip I made to China many years ago, in 1984.
My sketch books were very important to me and to this day the drawings from that trip remain far more important than any photos that I took.
 
Watch out for more mini folios...and have a Very Happy Christmas.
READ MORE » Little Collections

Happy Holidays!


Dear friends,

Happy holidays! I hope this greeting finds you happy, healthy, and excited about the year to come.


I wish you all the best in 2011. May it be a year full of wonder and merriment.

All the best,
Holly


READ MORE » Happy Holidays!

Little Collections

I am selling  little collections of prints from paintings and sketchbooks. 
Over the holidays I shall put together some others.  Each print is small, about 7cm x 10 cm or 2.5 inches x 4 inches. The size of a playing card.   They look wonderful framed in little frames and displayed together.  Printed on beautiful archival watercolour paper they are wrapped in a little folio made from watercolour paper.  Each collection will hold 12 little prints. 
This first one is from a trip I made to China many years ago, in 1984.
My sketch books were very important to me and to this day the drawings from that trip remain far more important than any photos that I took.
I shall be selling these for 24.00 from here, you can email me if you would like one, and also from my Etsy shop.
Watch out for more mini folios...and have a Very Happy Christmas.
READ MORE » Little Collections

Thank you!


Have a very Happy, and Merry ..., you know!
And stay warm and safe and have a lot of fun!

Can't wait to visit you all again soon.
Lots of Love!

Photos: 1st: Martina Voigt-Schmid, 2nd: Corrie Bond photography, 3rd: Good Life Eats, via Tumblr

READ MORE » Thank you!

First Light

Watercolour
18cm x 48cm or 7inches x 18 inches
The same line of Cornish oaks but this time in the first light of a cold frosty morning.  In the rushing madness of just before Christmas it is very good indeed to take a little time out, look at the sky, watch the dawn and feel blessed to be alive and to have friends and family to love and cherish.  Happy times to everyone, always.
READ MORE » First Light

Snow Cows Sketch

Watercolour sketchbook
No painting for so long feels odd.  I have got a bit of spare time having worked very hard on other commitments and finally got out and about, in the cold and snow.  This will be the info for a painting later today...will post up the results.
READ MORE » Snow Cows Sketch

It's Snowing

Watercolour
20cm x 50 cm or 8 inches x 20 inches

It is snowing!  Last light of the day and the cows are wandering off to find shelter in the lea of a hedge somewhere.
I love it when the leaden, snow laden sky lets go its hold and soft white flakes begin to fall, they bring a strange silence with them.
READ MORE » It's Snowing

Christmas decoration: 5 easy last minute ideas


5 ideas on a budget

for people who like it light and easy when it comes to Christmas - like me this year. Maybe because the days before Christmas for me, always seem to short to get everything done in them. Not just the decorations, but everything. So many things want attention. And because of this "hype", that doesn't really ad to the feeling of peace and harmony  i'd like to have, easy decoration seems to have what i need. 

Neat little trees and apples in a bowl, doves of peace made from white paper, pinecones stacked up in a tree shape or a plain tree adorned with vintage photos that brings remembrance of family members and times past. I feel very drawn to this "Memory-tree". All these ideas are charming, and you don't need to buy a lot of things to make them. How's your decoration-scheme this year?

Photos: 1-4 Country Living, last picture: Sweet Paul

READ MORE » Christmas decoration: 5 easy last minute ideas

Cornish Oak.

 Watercolour with scratching out over pencil
40 cm x 18cm or 16 inches x 7 inches

There is a line of Cornish Oaks, (also known as sessile oak) very near my house.  Their wind pruned shapes, gnarled and twisted against the sky are beautiful in any light but in the evening they excel.  As the sun dips lower in the sky and frost kisses the tips of the grass they stand out, almost in silhouette, like dancing sisters, lacy tracery of tiny branches against a cold cold sky.
I was checking out the new Google Books feature the other day and put in my name and it came up with lots of stuff, one of which was a painting by my great great grandfather with this description, Watercolor with scratching out over pencil, that sounds good I thought, so I did this painting as a bit of a homage to my old ancestor.  It was his influence, from way beyond the grave, via his ancient painting kit that languished in my Grandmothers attic, that made me think, at a very tender age, that being an artist was a good plan.
 So here you can see, in this detail, the scratching out as well as the pencil.  It is a nice technique, pencil work gives you confidence in that you know where everything is going before slapping on the colour and the scratching out provides that little frisson of excitement, will it wreck everything!
I don't think it did wreck it, just gave the frosty grass a little sparkle as it caught the last light of the day.
READ MORE » Cornish Oak.

silk sari ribbon

I have had lots and lots of people asking me where I get mine. I get it from someone at a booth at International Quilt Fest. His name is Ken Wing. 212-349-8694

http://www.leilaniarts.net/yarn/colorful-silk-sari-ribbon.html

I love his sari ribbon which is all sewn together. I cut it apart and use it in all sorts of things. 8D
READ MORE » silk sari ribbon

Friday Pretties: Deer oh deer!


Deer presents for someone de(e)ar!

Some cute Etsy-finds from todays elongated tea-break (white tea!). OK, they ARE a bit kitschy. But a little bit of kitsch should be allowed now and then, especially round christmas. Have you got your ducks in line friends? Ha ha, mine are running wild in the snow while i try to catch them and make them behave like good ducks. But they are running after that deer, the pink one, which is so sweet! I'm counting on this weekends good fortune to get most of the things done. And will be visiting you to see what you've been up to!

Lovely things & photos from: kitschygalore, the storybook rabbit, zeng, japonicas and in blue

Join the party and look at some more pretties here!

READ MORE » Friday Pretties: Deer oh deer!

CHA picts

My Little Yellow Bicycle Tote Bag - they always have the best bags.
Zutter make 'n take with loads of Smooch spray on the front. Below is an open bag. They have a distresser machine so you don't have to do it by hand now. Fun but messy.


This was a great make 'n take with the Crafty Chica, Kathy Cano-Murillo. She was very nice in person. Loved her book. My kids and their moms enjoyed it a couple of years ago, too. Wished it was published in Spanish as well. That would make too much sense. Hear me, publishers?!!!

Left is a Tim Holtz Make 'n Take and the right one is from a company that I can't remember the name of off-hand but her company had some very fun stuff. I am thinking Jill Schwartz.

Making Memories has a new thing out where you can cut out shapes with the adhesive on the back. You just pick it out and it does all the work for you on fabric. See the heart and flower shape I did? All you need to do is iron it on. Way fun and easy.


This was the most fun one that I did but it took the longest in line. It was make your own monster. Mine was probably the scariest. It is too small for any of my kids to wear. I will probably turn it into a pillow or an art quilt. It is "me".
I will blog more after the CHA supershow tomorrow. Stay tuned.


READ MORE » CHA picts

Resin ideas and projects

This is a shadowbox that I absolutely love that I created and then poured resin into it when I was done. You can pour resin into anything that is non-porous. It really helps to make your elements "POP!",
Here is a manual drill that comes with one of the resin kits or is sold separately that you can use to drill holes into the resin for making charms and/or pendants for necklaces/bracelets. It is really handy. If it wasn't so handy, I would put it into an artpiece!

People at CHA loved my resin spoons. So easy to make! You just need some old silver spoons. Look around at thrift stores or garage sales. I clean mine off first with alcohol to get rid of the grunge. I leveled my spoon with a couple of stamp pads. Put your little elements in and slowly pour the resin. Drip in a couple of drops at a time until it domes or until you get it to the level you want. Let it sit at least until the 12 hours or more until it cures. Check periodically for rising bubbles.


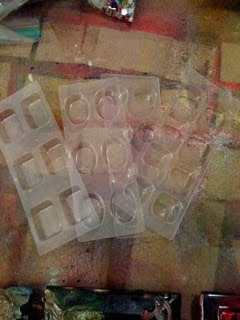
Here are some of the plastic molds that Little Windows carries. She uses them for photos. I use them for all sorts of little things that I put into other pieces of artwork. You can also use them for charms. Just make sure if you are going to drill holes into them that you leave some free space for holes. A tip is to leave in the freezer for a few minutes once they are done curing and they pop right out. This is a great thing to do with the kids. They love what comes out of them.

The molds come in different sizes and in sets.

Here is an idea for the swap. I have not had time to resin these yet but these were left over from the CHA demos. I did resin some but Little Windows has them. I filled little bottles with beads and text scraps. You can use whatever little bottles you have. You can find them also at
http://skybluepink.com/glass.html . They have them in all shapes and sizes. That is where I get all my funky bottles for my assemblages. You can fill the bottles just to cover the beads and text. What I do is pour the resin into little Dixie cups and sharpen the lip of the cup to make it easier to pour so I don't spill it when pouring it into the little opening of the bottle. It works great. You can also tip the bottle a little bit sideways so the resin dries sideways. Looks way cool!

On top is a resin flower that I used a cheap paint brush and brushed the resin on a paper Prima flower. Let dry on a release sheet like the ones that Avery labels come on. Once dry, it comes right on. Probably the waxy side of a freezer sheet would work. I also poured a bit of resin on my inchies but didn't cover the entire thing so give it a bit of a Pop! If you pour resin from the middle and don't do it quickly, it will go out to the edges of your paper/substrate and stop at the edges. Works better with the doming tray shown below.


Doming tray for doing resin without molds. Thoroughly explained on the Little Windows website. Go there for all sorts of vids on how to use resin and projects.

This is from CHA. This is from my demo where I filled the trays with all sorts of fun stuff. Let them sit for 12 hours and just pop out.


Okay, my iPhone doesn't take the best pictures but here are two up close.

Playing with resin is not as hard as you think it is. I hope that I gave you some ideas. Resin will work with anything that is non-porous. Just don't touch it for 12 hours while it cures. You can do the bottles, little molds, charms, spoons, etc. for the swap.


READ MORE » Resin ideas and projects
 
© 2010 The Art vs. The Life Friend Link: